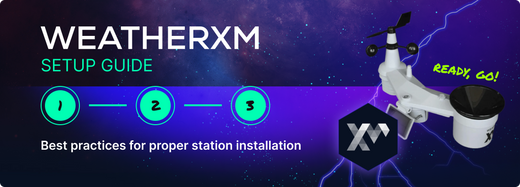
WeatherXM is a global weather network that rewards contributors for sharing accurate weather data. With over 5,000 stations in 80+ countries and $7.7 million in recent funding, the network aims to be the largest worldwide by 2025.
Participants contribute by setting up weather stations and providing data, helping improve forecasting accuracy while supporting a transparent, community-driven system. In return, they may receive $WXM tokens, the network’s native asset, for their contributions.
In this article, we’ll explain how to set up WeatherXM and everything you need to get started.
How to Set Up Your WeatherXM Station?
Proper installation ensures accurate weather data and helps you make the most of your participation in the WeatherXM network. Follow these steps for an optimal setup.
Unboxing and Overview
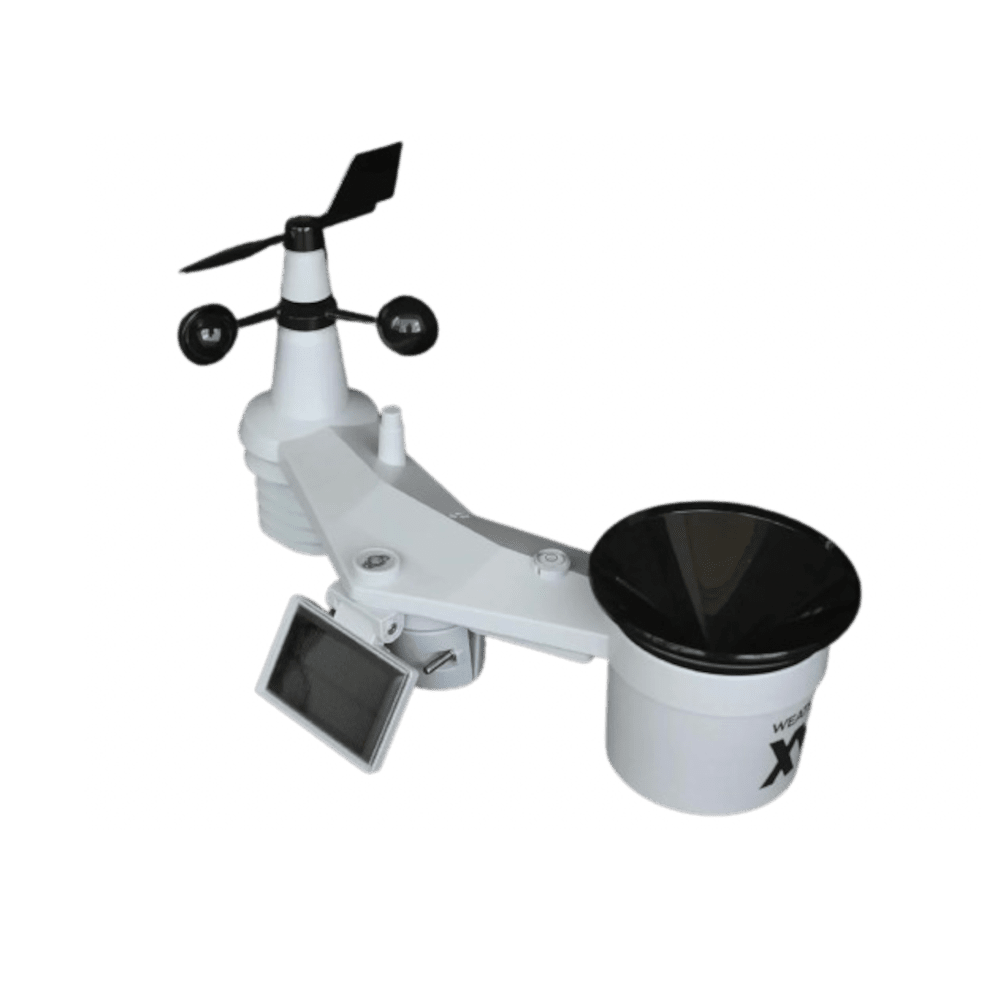
Inside your WeatherXM package, you’ll find:
- Outdoor sensor (Measures rain, temperature, humidity, light intensity, wind speed, and direction. It comes with a built-in radiation shield for accurate temperature readings and a rain gauge with 0.3 mm precision),
- An M5 indoor gateway (This indoor device connects to your Wi-Fi and the cloud. It relays weather data from the outdoor sensor to the WeatherXM network),
- Mounting hardware,
- USB power cable,
- GPS antenna,
- Radiofrequency antenna (if needed),
- and a quick start guide.
To properly install your station, you’ll need:
- A pole (at least 2 meters / 6.5 feet tall) to mount the outdoor sensor.
- A secure base or bolts to stabilize the pole and prevent movement.
Step #1: Setting Up the Outdoor Sensor
Use a compass app to align the sensor so the indicated “West” matches your compass direction.
Secure the outdoor sensor on a metal mast outdoors, ensuring it’s away from obstacles like walls or tall structures that could interfere with data accuracy.
Location Tips:
- Avoid heat sources and chimneys (keep at least 5m/16.4ft away).
- Choose a location not shadowed throughout the day.
- Keep a distance from obstacles 2-4 times larger than the height of the tallest nearby object. For obstacles over 8m (26ft), consider a distance 30 times the width and 15 times the height.
Download the free PDF guide to determine if your home meets the best installation criteria for optimal data collection and full network participation.
Install the sensor on a metal mast away from tall obstacles for accurate wind and rain readings. Ensure the sensor is balanced using the built-in bubble level.
Use two AA batteries for the outdoor sensor (avoid rechargeable batteries). Lithium batteries are recommended for longer life in cold climates.
Before mounting outdoors, check that all parts are working correctly by keeping the sensor within 1.5m (5ft) of the M5 gateway and confirming that all readings appear on the screen.
While fastening the sensor to the pole, check the bubble level to ensure it's balanced within the red circle. If it’s not, adjust the pole or use shims between the sensor and pole for precise leveling.
Step #2: Setting Up the M5 Gateway
- Press the button at the bottom to turn it on.
- Swipe left on the screen, configure your Wi-Fi settings, and connect the gateway to the internet. Once connected, the Wi-Fi icon on the display turns green.
- Connect the GPS antenna, step outside briefly to get an initial GPS signal, and then move the gateway back indoors near a window.
Step #3: Pairing the Outdoor Sensor and M5 Gateway
Install batteries in the sensor and ensure the red LED flashes every 16 seconds, indicating data transmission. Keep the sensor and gateway close for initial pairing.
Step #4: Checking Data Transmission
If your M5 gateway displays live data (e.g., temperature, wind speed), everything functions correctly.
Monitor for a few minutes to ensure consistent updates.
If there’s no data, reduce the distance between the gateway and the sensor, avoid obstacles, or relocate them for better communication.
Step #5: Configuring the WeatherXM App
Create an account in the WeatherXM app.
Use the device serial number (found on the M5 screen) to register your station. Your location will appear on the map if the GPS signal is correct.
Once completed, you’ll see live weather data on your phone.
Best Practices for WeatherXM Station Installation
Proper placement of your WeatherXM station ensures accurate weather data and optimal participation in the network. Follow these guidelines to maximize performance and maintain high-quality readings:
- Deploy at a High Point: Place the station on the highest available point, such as a rooftop, to minimize interference from obstacles. The goal is for the outdoor sensor to be above surrounding objects.
- Mount on a Tall Mast: Use a pole that is at least 2m (6.5ft) high to elevate the sensor above ground-level interference and improve measurement quality. Ideally, a 5m (16.5ft) mast is used for the best results.
- Distance from Obstacles: Place the station at a distance 2-4 times the height of the nearest obstacle. For tall structures like trees over 8m (26ft), maintain a distance of at least 30 times the obstacle's width and 15 times its height.
- Clear Horizon Around Sensor: Ensure there are no obstructions like walls, chimneys, or nearby tall structures that can block wind flow, cast shadows, or affect temperature and humidity readings. Move the sensor to a more open area or elevate it further if necessary.
- Stabilize the Mast Firmly: Secure the pole tightly to prevent oscillations, especially in strong winds, which can cause inaccurate wind and rain measurements. Use support wires if necessary for extra stability.
- Avoid Heat Sources: Keep the station at least 5m (16.4ft) away from heat sources, chimneys, or vents to prevent inaccurate temperature readings. Smoke and warm air can skew data on temperature and wind.
- Full Sun Exposure: Place the sensor in a spot exposed to sunlight all day to avoid shadow interference that can affect readings, especially solar radiation.
- Balance the Sensor: Use the bubble level on the sensor to ensure it’s properly aligned. An unbalanced sensor can lead to incorrect wind speed, direction, and precipitation data. If adjustments are needed, use shims to level it out.
- Check Nearby Structures: If placing on a roof or near buildings, ensure the sensor is at least 2m (6.5ft) higher than any nearby structure to prevent false data from roof heat, shade, or wind disruptions.
- Avoid Balconies or Fences: Do not place the station on balconies or low structures like fences, as they are prone to turbulence and inaccurate readings. Always elevate the sensor using a tall mast.
- Move Away from Chimneys: If the station is near an active chimney, relocate it at least 5m (16.4ft) away on a tall mast. A 2m (6.5ft) mast is sufficient if the chimney is inactive.
Best Places to Setup WeatherXM Station
Choosing the right location for your WeatherXM station ensures accurate weather data and maximizes network participation. Here are some of the best places to install your station for optimal performance:
- Rooftops with a Clear View (High vantage point, away from obstructions like trees and chimneys for accurate readings).
- Flat, Open Fields or Meadows (Great for capturing natural weather conditions).
- Isolated Poles in Rural or Suburban Areas
- Farmland or Agricultural Areas
- Parks or Public Gardens
- Tall Apartment Blocks or Office Buildings
- Coastal or Lakeside Locations
- Open Terraces or Decks
- Remote Areas or Edge of Town
- Community Open Spaces
WXM Helium Weather Station
$429.00 $479.00
★★★★☆ (4 Reviews)
This unit monitors the environment. Providing hyper local weather data. You will be rewarded in WXM tokens for installing this.
Buy on HeliumDeployConclusion
Setting up a WeatherXM station allows you to contribute accurate weather data while participating in the network. A proper installation and an ideal location—whether on a rooftop, farmland, or near the coast—ensure reliable data collection and effective network support.
By following these setup guidelines, you can make the most of your station and help build a decentralized weather network.
Interested in joining the WeatherXM community? Explore your options and start contributing today!