How to Set Up Your GEODNET System: A Step-by-Step Guide
GEODNET (Global Earth Observation Decentralized Network) uses small GNSS antennas, which anyone can install on their roof, to enhance location precision. These antennas act as reference stations that improve GPS data, and participants who set up these stations earn GEOD tokens.
In this article, we’ll explain how to set up your GEODNET system and how this network provides centimeter-level accuracy.
Setting Up Your GEODNET System
To get started with your GEODNET setup, you'll use the HYFIX device, also known as the MobileCM miner, which connects to small GNSS antennas to provide enhanced location data.
Below is a step-by-step guide for setting up your device and connecting it to the GEODNET network (typically takes around 60 minutes).
Unbox and Start-Up the HYFIX Device
What’s Inside the Box:
- GNSS Triple Band Antenna: This antenna captures satellite signals and connects to the miner.
- Antenna Cable (9m): Connects the antenna to the miner.
- HYFIX MobileCM Miner: The core device that transmits data to the GEODNET network.
- Wi-Fi Antenna: Enables the device to connect to your Wi-Fi.
- USB-C Cable: Powers the miner using a 5V, 2.5, or 3 amp USB charger.
- Mounting Rod and Brackets: Used to install the antenna securely on your roof or in an unobstructed location.
Connect the Cables:
1. Plug the USB-C cable and power the HYFIX with a 5V, 2.5, or 3 amp USB charger.


3. Connect the smaller end of the satellite antenna cable to the “GNSS+” port on the device and the larger end (TNC-Male) to the satellite antenna.
Note: The “UWB” port is for future expansions, so it can be left unused for now.
Power Up and Understand the LED Indicators:
Switch the HYFIX unit to the "ON" position.
- Red LED (Power) – Solid when powered.
- Green LED (Wi-Fi/Internet) – Blinks slowly in AP Mode (setup mode), blinks fast when trying to connect to Wi-Fi, and becomes solid when connected to the internet.
- Orange LED (PPS) – Will blink once per second when the antenna detects satellite signals (this may take a few minutes).

Use the provided Wi-Fi antenna for the best connection.
Wi-Fi Connection and Internet Setup
Connect to the Device's Wi-Fi:
1. Find and connect to the HYFIX device’s Wi-Fi network on your phone, PC, or Mac. It should appear as “MGW200_...” or “MobileCM_...”.
2. Use the serial number found on the back of the HYFIX device as the password.

Configure Network in AP Mode:
1. After connecting to the device's Wi-Fi, open a browser and enter the IP address 192.168.4.1.
2. Enter your Wi-Fi SSID and password to connect the HYFIX to your home network.
3. Create a miner key (at least 12 characters, no special characters), which you'll use later.

If the green light blinks again, recheck your Wi-Fi connection settings.
Access the MobileCM WebUI (Station Mode):
1. Check your router's settings to find the device named "espressif."
2. Note the IP address (usually 192.168.x.x) assigned to the MobileCM.
3. Enter this IP address in your web browser to access the WebUI.

Register on Console.Geodnet.com
Transmitting Data to GEODNET:
1. If your setup is correct, you’ll see "TRANSMITTING" status on the WebUI, indicating that data is being sent to GEODNET.

Register the Device Online:
1. Go to console.geodnet.com.2. Use the serial number on your device to register it, give your miner a nickname, and input your miner key.
Add Your Wallet:
1. Enter your crypto wallet address under the "Wallet" section in the console.2. Once linked, your rewards in GEOD tokens will start accumulating based on your miner’s performance and data transmission.
Where to Set Up GEODNET Miner (Site Selection)?
GNSS signals travel approximately 20,000 km from satellites to your base station and arrive with very weak power. Because these signals are so faint, they are easily affected by their surroundings. A poor setup can weaken the signal strength, impacting your token rewards.
- Ensure an Open-Sky View: Install the GNSS antenna in a location with a clear, unobstructed view of the sky. The goal is to have no obstructions beyond a 10-degree elevation angle from the base of the antenna. This setup is crucial for capturing strong satellite signals.
- Install at the Highest, Secure Point Possible: Place your antenna as high as securely possible on your roof or building. The higher the antenna, the better its ability to maintain a strong signal. Ensure it is firmly installed to avoid damage from weather conditions.
- Keep the Antenna Angle Correct: Position your antenna at a perfect 90° angle, pointing straight to the sky. A slight tilt can affect the quality of the received signal.
- Avoid Signal Blockage or Interference: Don't place the antenna near objects that can block signals or cause electromagnetic interference, such as power lines, DC/AC converters, or high-power signal generators.
- Mind the Antenna Cable Pathway: Make sure there are no significant bends, especially near the connector of the antenna cable. The cable should be as straight as possible to maintain signal integrity. Use only the cable supplied in your HYFIX miner kit to prevent signal loss and potential token reduction.
- Weather Protection Considerations: While the GEODNET antenna is designed to withstand harsh weather conditions, if you live in an area with frequent lightning, consider adding protective covering over your miner for additional security.
Things to Consider While Mining GEOD Tokens
Proper power supply, connectivity, and ongoing monitoring are key factors in ensuring that your miner continues to transmit data efficiently and earn rewards. Below are some important considerations to keep your miner running at its best.
- Provide Stable Power Supply: Use a 5V, 2.5 amp power adapter to ensure stable power to your miner. Fluctuations in power can impact the miner's performance and reduce your GEOD token earnings.
- Install Near Wi-Fi Hotspot for Optimal Connectivity: The miner should be set up as close to your Wi-Fi router or hotspot. Better signal strength means a more reliable connection to the GEODNET network, ensuring continuous data transmission.
- Regularly Check Signal Strength: Monitor the signal-to-noise ratio (SNR) of your miner on console.geodnet.com. If the SNR falls below 32 dB, you will not receive tokens, indicating the need to improve your setup.
- Avoid Antenna Splitters and Third-Party Cables: Do not use splitters or third-party cables, as these can significantly reduce signal strength or damage the miner. The antenna and cable provided by the miner are designed to work optimally together.
- Avoid Unnecessary Reconfiguration: Once your miner is set up correctly and functioning well, avoid making adjustments or reconfiguring it for other purposes. Tampering with a well-performing setup could signal issues or damage to your miner.
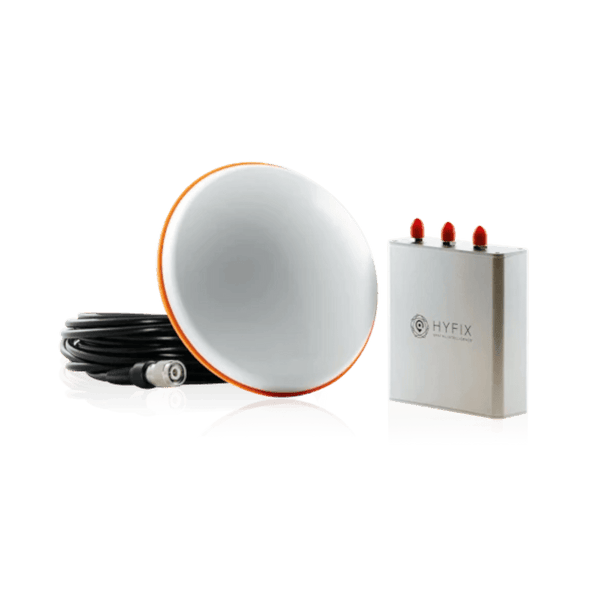
Geodnet MobileCM (Triple-band)
$749.00
★★★★★ (12 Reviews)
This unit gathers dense real-time geospatial data from the Earth. You will earn GEOD tokens for installing this.
Buy on HeliumDeployConclusion
Getting your GEODNET miner set up is actually pretty simple and can earn you some GEOD tokens while helping improve location services.
Act now and be one of the first to contribute to the future of geospatial data with GEODNET! Grab your GEODNET MobileCM Triple-Band kit now and start earning rewards today.
3 comments
I COULD USE SOME HELP WITH ON BORADING IS THERE SOMEONE WHO CAN HELP ME? 323-218-8212
What if i use a VPN on my computer? Thanks
Hi guys, I really want to buy a set up but I am concerned about the 10 degrees situation, our house has some (five) large trees encompassing about 45-50 degrees total of the surrounding area from the peak of our house. Does this sound like it will be a problem? The device sounds very much so reliant upon 360 degrees of open air. Please let me know your thoughts, if you would be so kind.